A couple of days ago Symfony2 was finally released. I had been waiting for it because it promised to work with MS SQL Server 2008 via Doctrine2. I know what you're thinking why use SQL Server? Well let's just say that it's a job requirement.
This post attempts to replicate the example show on the Symfony site for Interactive Generators on Windows with a couple of twists. First I attempt to use MS SQL Server 2008 and add complex relationship between Posts and Tags as proposed on http://www.dobervich.com/2011/03/05/symfony2-blog-application-tutorial-part-ii-the-data-model/ .
Installation
I´ll be using Wamp 2.0 with PHP 5.3.6 (to learn how to configure PHP 5.3.6 with Wamp read http://markushedlund.com/dev-tech/install-php-5.3.3-on-wamp ) and MS SQL Server 2008 R2 (Express).
Download Simfony2.0.0 zip file.
Make sure php.exe is in your path variable.
Unzip the content of the zip file into your netbeans project directory (C:\NetbeansProjects for me).
Rename the Symfony directory to acme_blog.
Open a command window and move to the acme_blog directory.
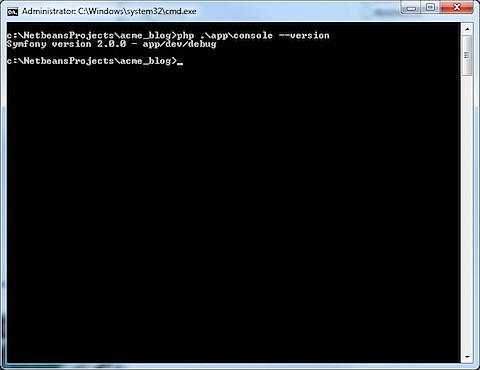
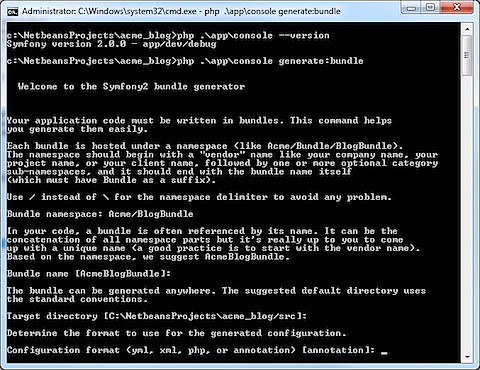
Run php .\app\console --version.
You should get the version of Symfony as shown:
Generating a Blog Bundle
On the command window run:
php .\app\console generate:bundle
Fill the data as follows:
Bundle namespace: Acme/BlogBundle
Bundle name[AcmeBlogBundle]:
Target directory [C:\NetbeansProjects\acme_blog/src]:
Configuration format (yml, xml, php, or annotation) [annotation]:
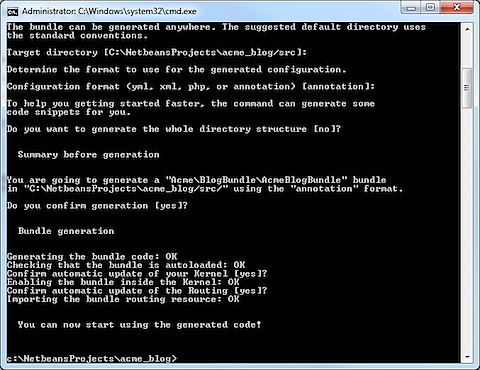
Do you want to generate the whole directory structure [no]?
Do you confirm generation [yes]?
Confirm automatic update of your Kernel [yes]?
Confirm automatic update of the Routing [yes]?
Opening the Project with Netbeans 7.0
Open Netbeans select File\New Project…
Select PHP Application with Existing Sources.
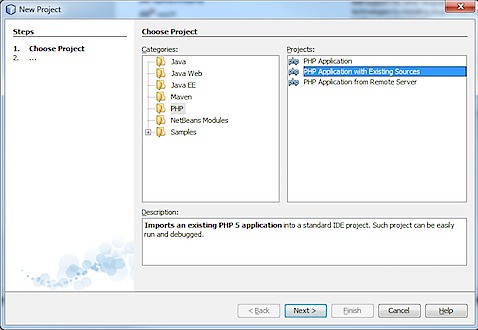
Click Next.
Select the source folder where you unzipped the Symfony framework.
Select PHP Version: 5.3
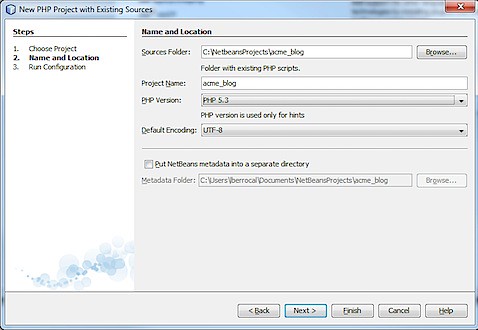
Click Next.
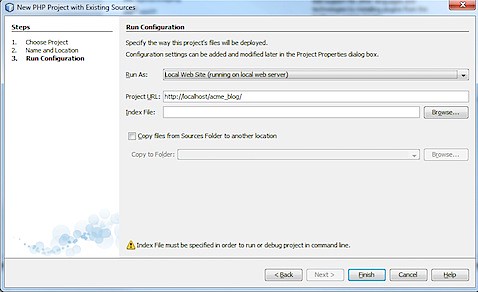
Click Next.
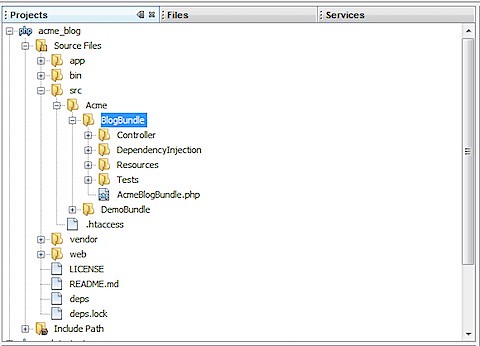
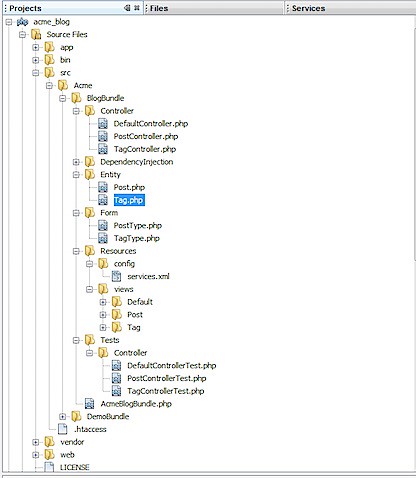
On the Projects tabe you should be able to see the BlogBundle.
Generating the Doctrine Entities
All the magic of Symfony 1.4.x where you created your schema con your schema.yml file and with a build --all command you would get your entities and database created for you are gone.
With Symfony 2 you use the gen:doctrine:entity command to dynamically create an entity.
Post Entity
We are going to create an entity name Post, that has three fields title (String (255)), body (String(255)) and published_at (datetime).
On a command window type:
php .\app\console gen:doctrine:entity
The Entity shortcut name: AcmeBlogBundle:Post
Add the three fields as shown:
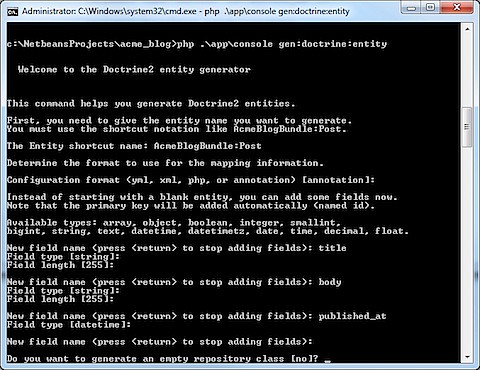
Do you want to generate an empty repository class [no]?
Do you confirm generation [yes]?
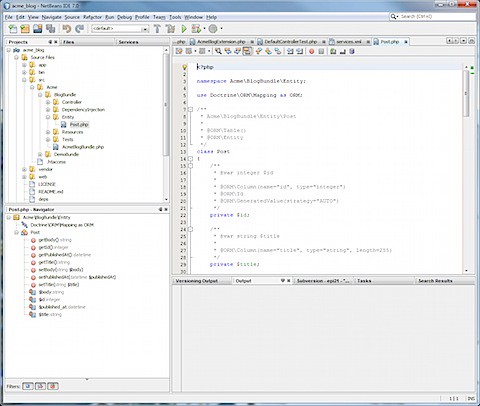
Look for the entity in your Netbeans Project under acme_blog\src\Acme\BlogBundle\Entity\Post.php
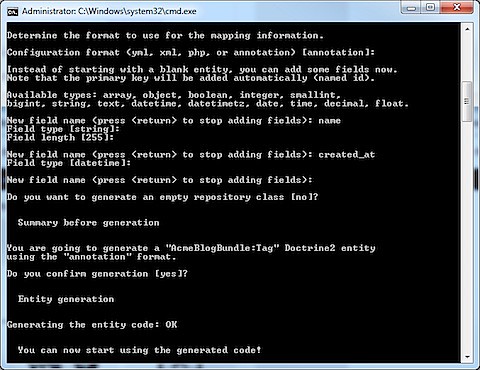
Tag Entity
We are going to create an entity name Tag, that has two fields name (String (255)) and created_at (datetime).
On a command window type:
php .\app\console gen:doctrine:entity
The Entity shortcut name: AcmeBlogBundle:Tag
Add the two fields as shown:
Manually Create the Many to Many Relationship
Open the Post.php file and add the following code at the beginning
use Doctrine\Common\Collections\ArrayCollection;
Under the published at field add the following code:
/**
* @ORM\ManyToMany(targetEntity="Tag")
* @ORM\JoinTable(name="post_tag", joinColumns={@ORM\JoinColumn(name="post_id", referencedColumnName="id")}, inverseJoinColumns={@ORM\JoinColumn(name="tag_id", referencedColumnName="id")} )
* @var ArrayCollection $tags
*/
private $tags;
….
public function getTags(){
return $this->tags;
}
public function setTags($tags){
$this->tags =$tags;
}
Overriding the __ToString() function on Tags
public function __toString(){
return $this->name;
}
Create a Database
Start Wamp.
Create the Database Manually
Open Microsoft SQL Server Managemente Studio.
Right click con Databases and select New Database.
On the New Database window. Type acme_blog on the Database name and select sa as Owner.
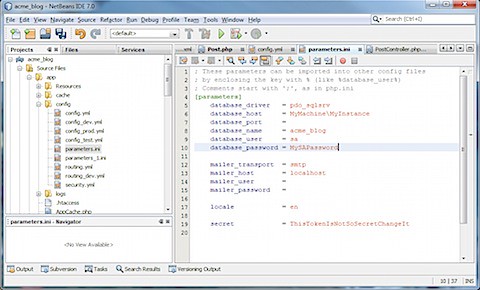
Edit the parameters.ini
Edit the Source Files\app\config\parameters.ini
Change the database_name to acme_blog, database_host to your instance, database_user to sa and database_password to your sa password.
On a command window type:
php .\app\console doctrine:schema:create
This will create the table Post, Tag and post_tag.
Generating CRUD Controllers and Templates
On a command window type:
php .\app\console doctrine:generate:crud
The Entity shortcut name: AcmeBlogBundle:Post
Do you want to generate the "write" actions [no]? y
Configuration format (yml, xml, php, or annotation) [annotation]:
Routes prefix [/post]:
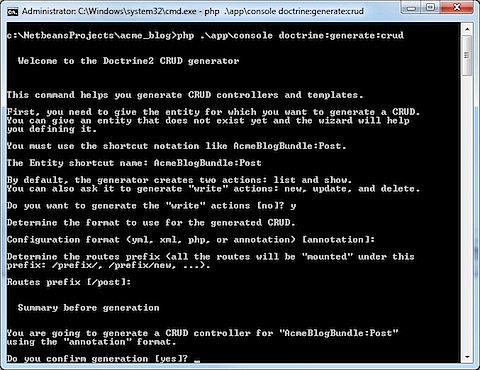
Do you confirm generation [yes]?
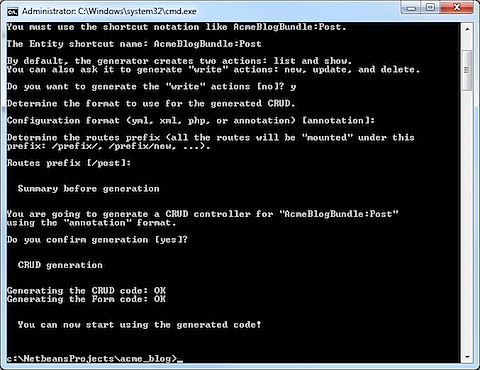
This action creates the Views and Forms as well as the entries in the PostController.
Repeat the process for the Tag entity.
Testing the Bundle
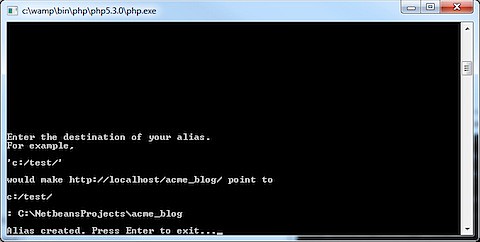
Click on the Wamp icon and click on Apache\Alias directories\Add an alias.
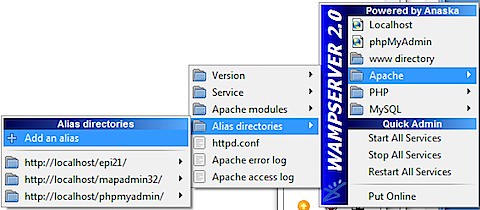
Use acme_blog as alias and point to C:\NetbeansProjects\acme_blog.
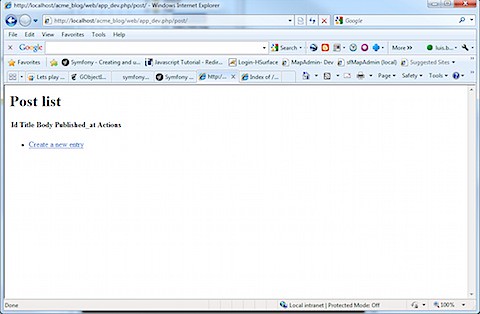
Access the url http://localhost/acme_blog/web/app_dev.php/post/. You should be able to add a Post.